UK: +44 (0) 191 587 8730 | US: +1-813-886-2775
How do I create templates on Med-eBase for use on the Rigel 288+ and 62353+?
This application note is a guide to enable easy and quick usage of the Rigel 288+/62353+ using templates for specific makes and models of devices which can be uploaded onto the Rigel 288+/62353+ and then the user can enter the device’s serial number and run the test without requiring to enter any other details as they are linked to the template.
Equipment required
- Med-eBase software
- PC
- Rigel 288+/62353+
- Required test sequence/user manuals for devices
- Bluetooth or serial communication between PC and Rigel 288+/62353+
Creating the Template using Med-eBase
1) Firstly the template needs to be created in Med-eBase. When Med-eBase is opened select either Edit > Add New Asset or the + icon on the right hand side of the screen.
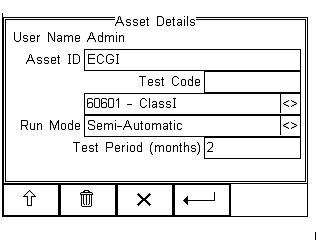
2) On the Asset details tab the Asset Name and Equipment class need to be entered. The Asset Name should be the name for the template e.g. 1BF1 or 12 lead ECG. The select Apply. The description may also be filled in to describe the applied parts. All other fields are device specific and can therefore be added when the template is on the Rigel 288+/62353+ or after the results are downloaded back into Med-eBase after the testing is complete.
Note: The Asset ID field on the Rigel 288+/62353+ is case sensitive and therefore it is advised to keep names simple and to one case style.

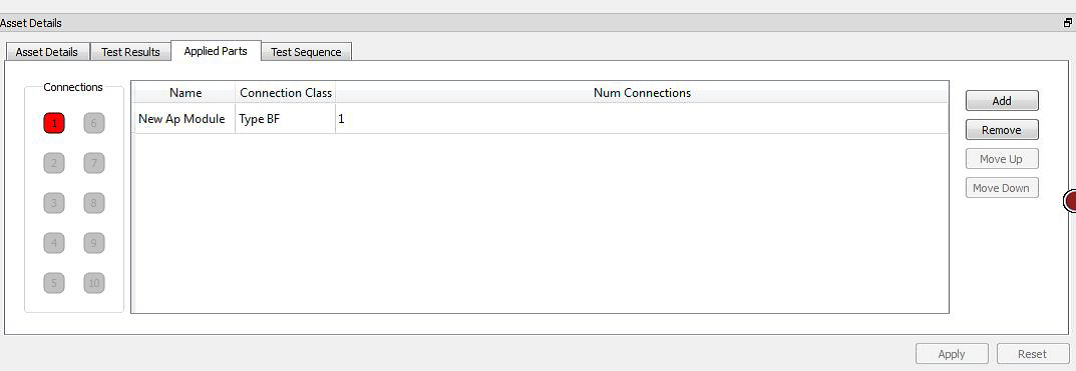
3) On the Applied Parts tab the Applied Parts need to be added by selecting the Add icon on the right hand side of the screen.
4) Once an Applied Part has been added double click on the required fields to change the Name, Connection Class and Number of Connections. E.g. For 12 Lead ECG there is 10 CF AP. For defibrillators you will need to add another AP as defibs have both CF and BF APs; 2 BF for the paddles and 3 CF for 3 Lead ECG. Then select Apply.
5) On the Test Sequence tab make sure that the Instrument Type is Rigel 288+/62353+. The test sequence to be performed needs to be added or imported in this tab.
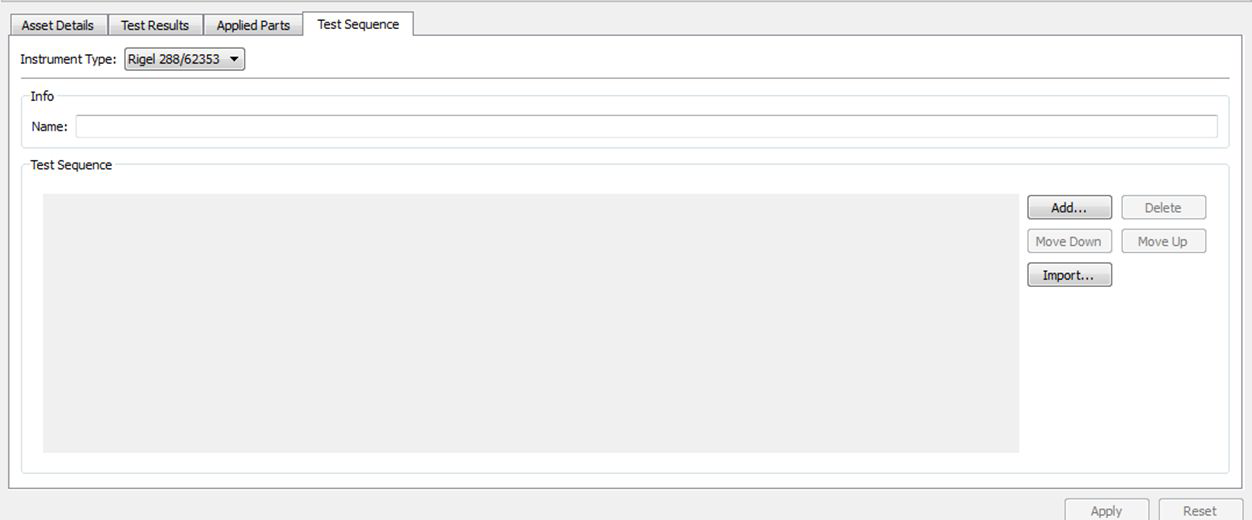
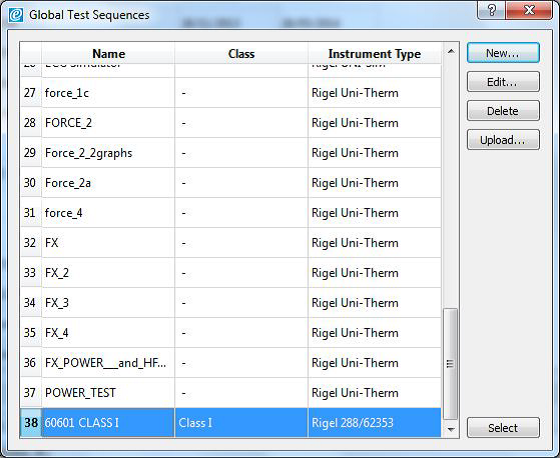
6) Global test sequences can be imported using the Import… icon which will open the global test sequence menu. The appropriate test sequence can be highlighted and then Select to import the sequences into the Asset Template.
7) Alternatively tests can be added to create a sequence using the Add… icon. Move down, Move Up and Delete allows the user to organise the test sequence as desired.
Note: Holding down Ctrl when selecting multiple tests allows them to be added simultaneously. The tests will be added in the order they were select and can therefore may creating a test sequence easier
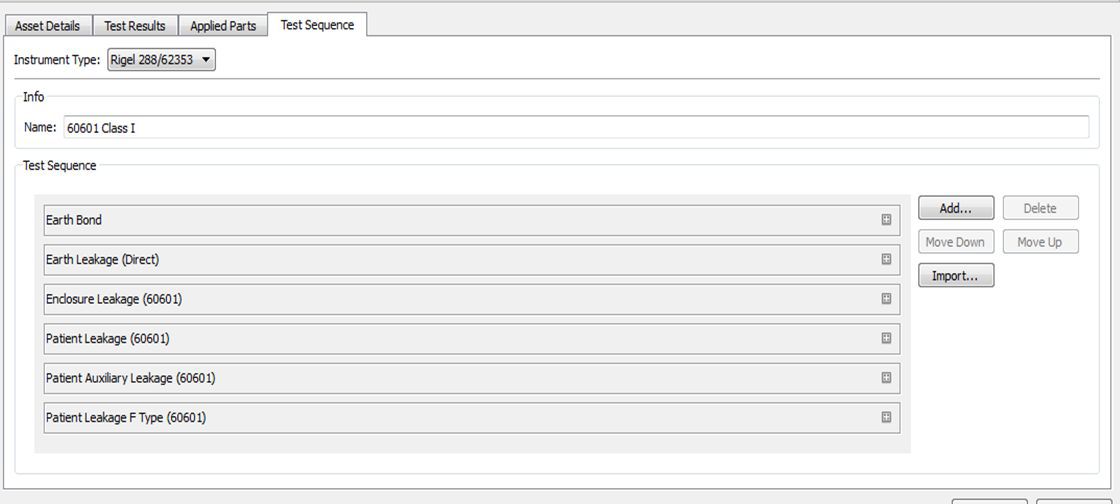
8) The Name selected in the Info field will be the test name given on PDF and certificates once the test results are downloaded.
E.g. 60601 Class 1 or 12 lead ECG class 1.
9) When complete select Apply to save changes.
Upload the template onto the Rigel 288+
Note This feature is only compatible with Rigel 288+ devices that have firmware Version 5 and higher. Please see application note 0029 on how to upgrade Rigel 288+ Firmware for this feature to be available.
1) Firstly ensure that the PC and Rigel 288+ are connected either via RS 232 cable or Bluetooth.
2) Go to F4 > Data Transfer> Upload from PC> F4 tick to confirm
3) On Med-eBase select the Asset Template so that is it highlighted. Alternatively hold down Ctrl to add multiple assets or Ctrl A to select all.
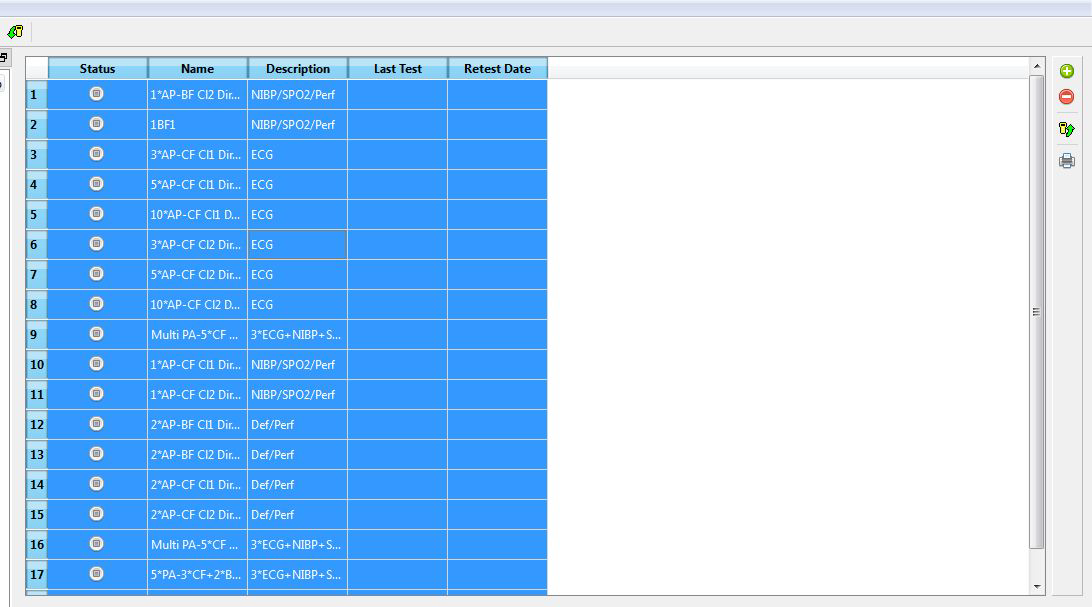
4) Right click and select upload or select the upload icon from the right hand side of the screen or go to Tools> Upload
5) Select the correct Instrument Type from the drop down list. The Default baud rate for the Rigel 288+ is 57600. Select the correct COM port which is the Bluetooth connection (you may need to look at your Bluetooth properties to check the correct COM port) or COM 1 if using a RS 232 serial cable.
6) Select Ok and once the Bluetooth icon appears in the right corner of the Rigel 288+ select Ok to start the upload.
To use the template on the Rigel 288+/62353+
1) Switch on the Rigel 288+ / 62353+ and press Menu (F4) and then Auto Mode.
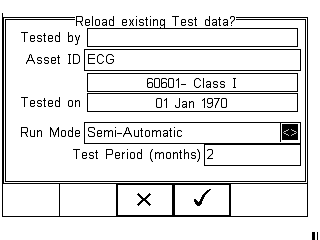
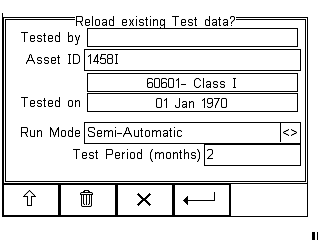
2) In the asset ID field type in the Template Name e.g. “1BF1 or 12 Lead ECG” and select F4 to confirm. This will then take you to the Retest existing Test date? Screen which recognises the set up from the template uploaded from Med-eBase.
3) You can now edit the Asset ID field with the Asset Number of the specific device being tested. Then select F4 to confirm.
4) The asset trace variables for the device under test can also be entered. When complete select F4 to confirmand start the test.
I'd like to talk to a sales advisor


Sign up to our Newsletter.
Stay up to date with the latest industry and product news, as well as our free educational content such as webinars and our expert guides.
Close